Project
Pyramid of Light
A modular LED pyramid stage prop built in 9 days for a themed live event.
Inspired by Daft Punk’s 2006 Sahara Tent pyramid visuals, I designed and built a lightweight, modular pyramid made from PVC and shop lights, using custom 3D printed connectors for fast assembly and transport.
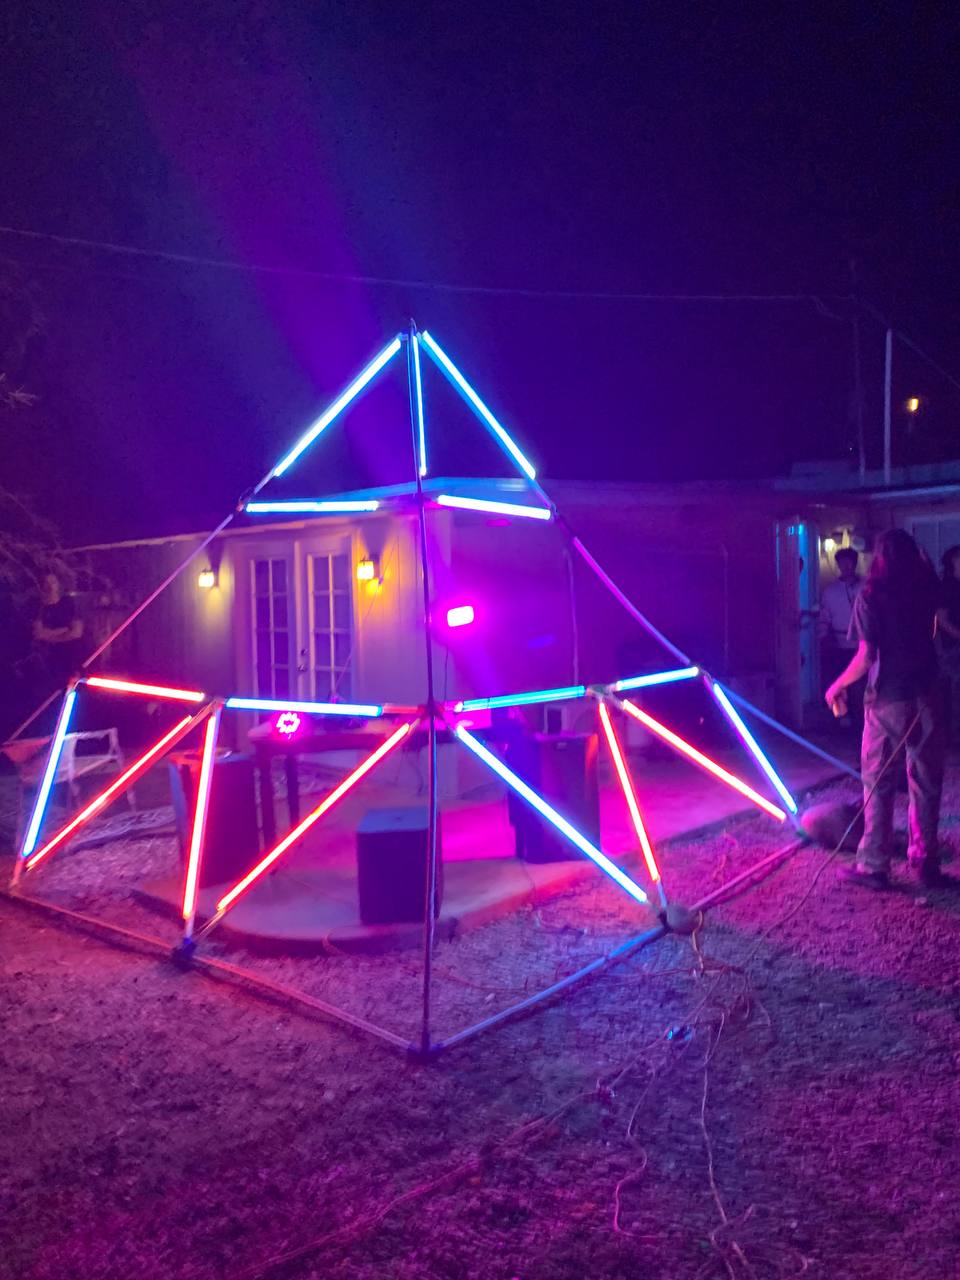
Final build in use at the event. Designed for fast assembly, stability, and visual impact.
Why
About nine days before a themed live event, I was asked for decoration ideas. I pulled inspiration from the Daft Punk Sahara Tent pyramid visuals and translated the concept into something I could actually build quickly and cheaply.
- Goal: a striking pyramid centerpiece that reads from across a crowd.
- Constraints: under roughly $150, minimal tools, fast print time, fast assembly.
- Reality: last minute venue changes and limited build window.
What
The Pyramid of Light is a modular frame system built from PVC struts and custom 3D printed connectors. LED shop lights mount along edges to create clean triangular silhouettes that look like a stage structure, without the complexity of LED panels.
Key requirements
- Modular triangles that assemble quickly and repeat reliably.
- Stable for multi hour use with a dense crowd nearby.
- Transportable in a car with simple packing.
- Lighting that is bright on camera but not painful up close.
Inspiration
This build is directly inspired by the pyramid aesthetic from the Daft Punk Sahara Tent era. The goal was not to replicate LED screens, but to capture the triangular geometry and stage presence.
Reference clip (external, not my content):
Schematic & Plan
I started by locking the triangle geometry, then validating it with a scaled toothpick model before committing to full size PVC. From there, I translated connection points into printable connector parts and a simple assembly map.
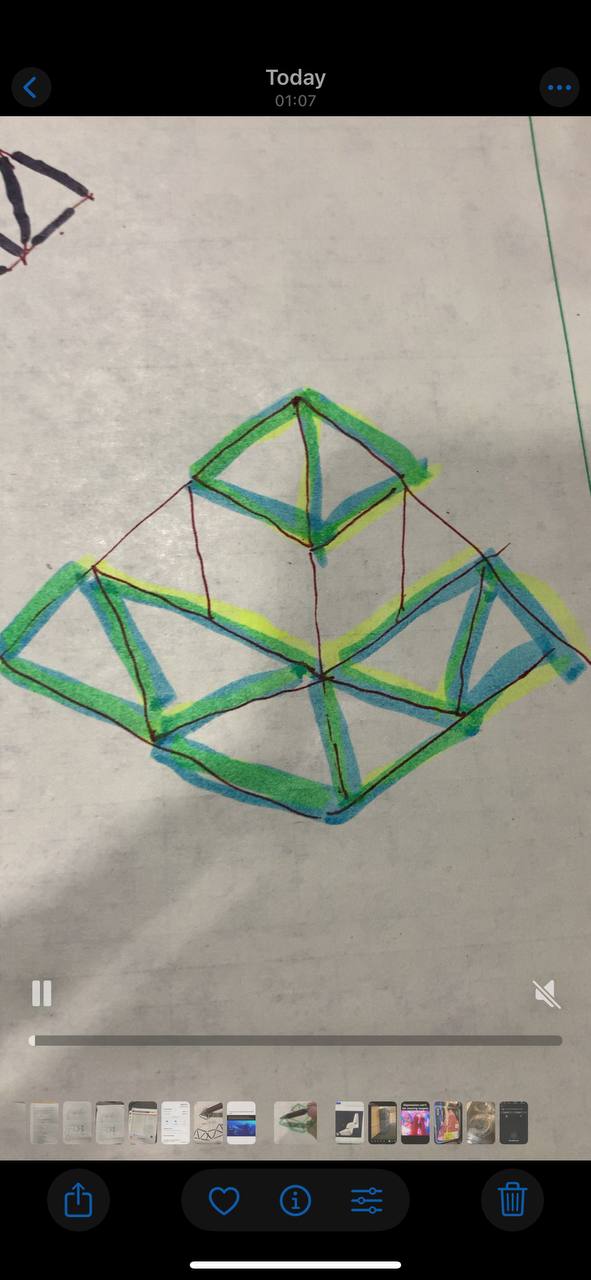
Initial sketch
Concept direction and stage silhouette.
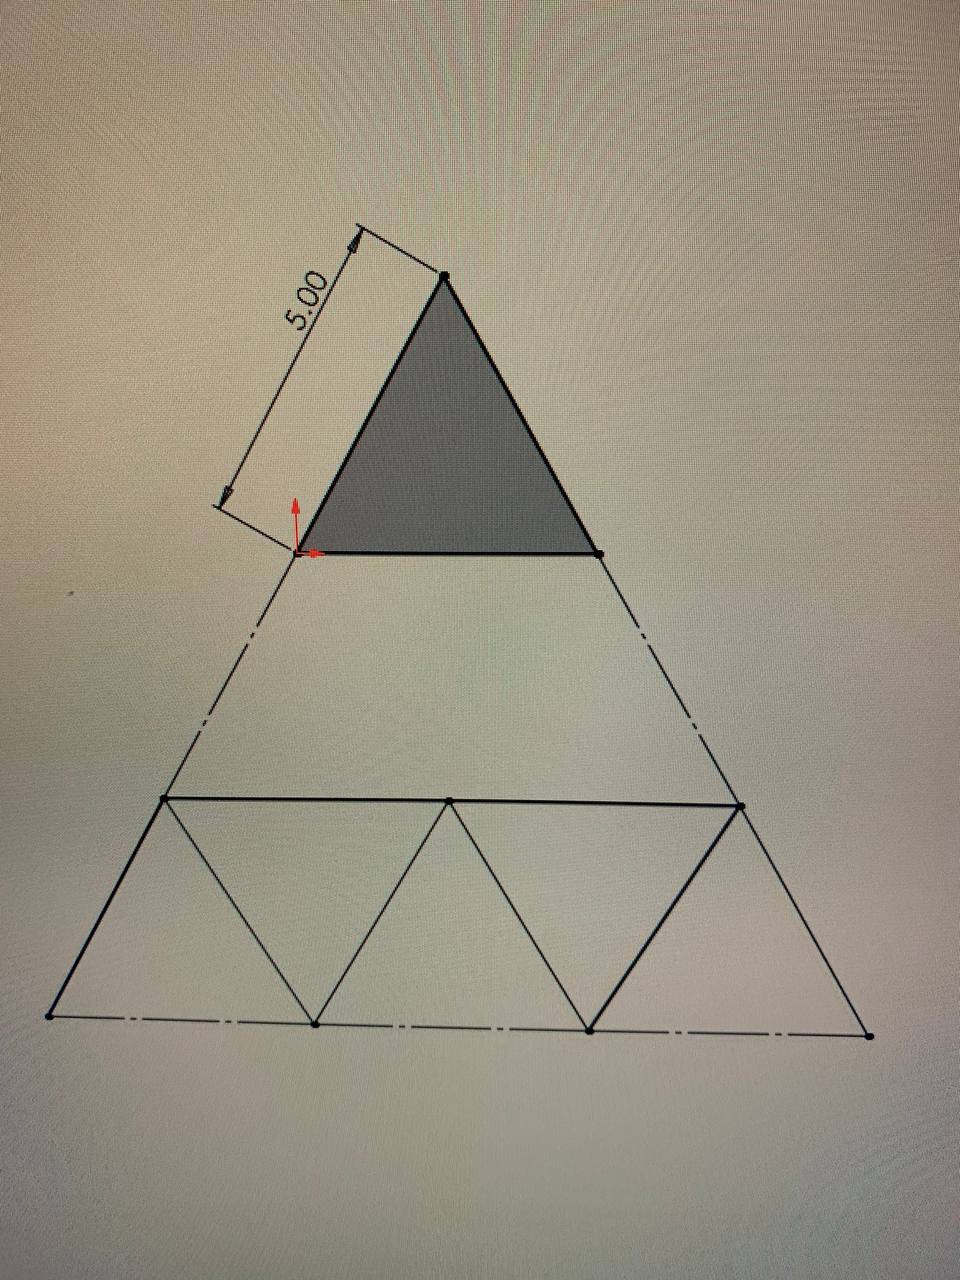
CAD line layout
Locked strut lengths and triangle placements.
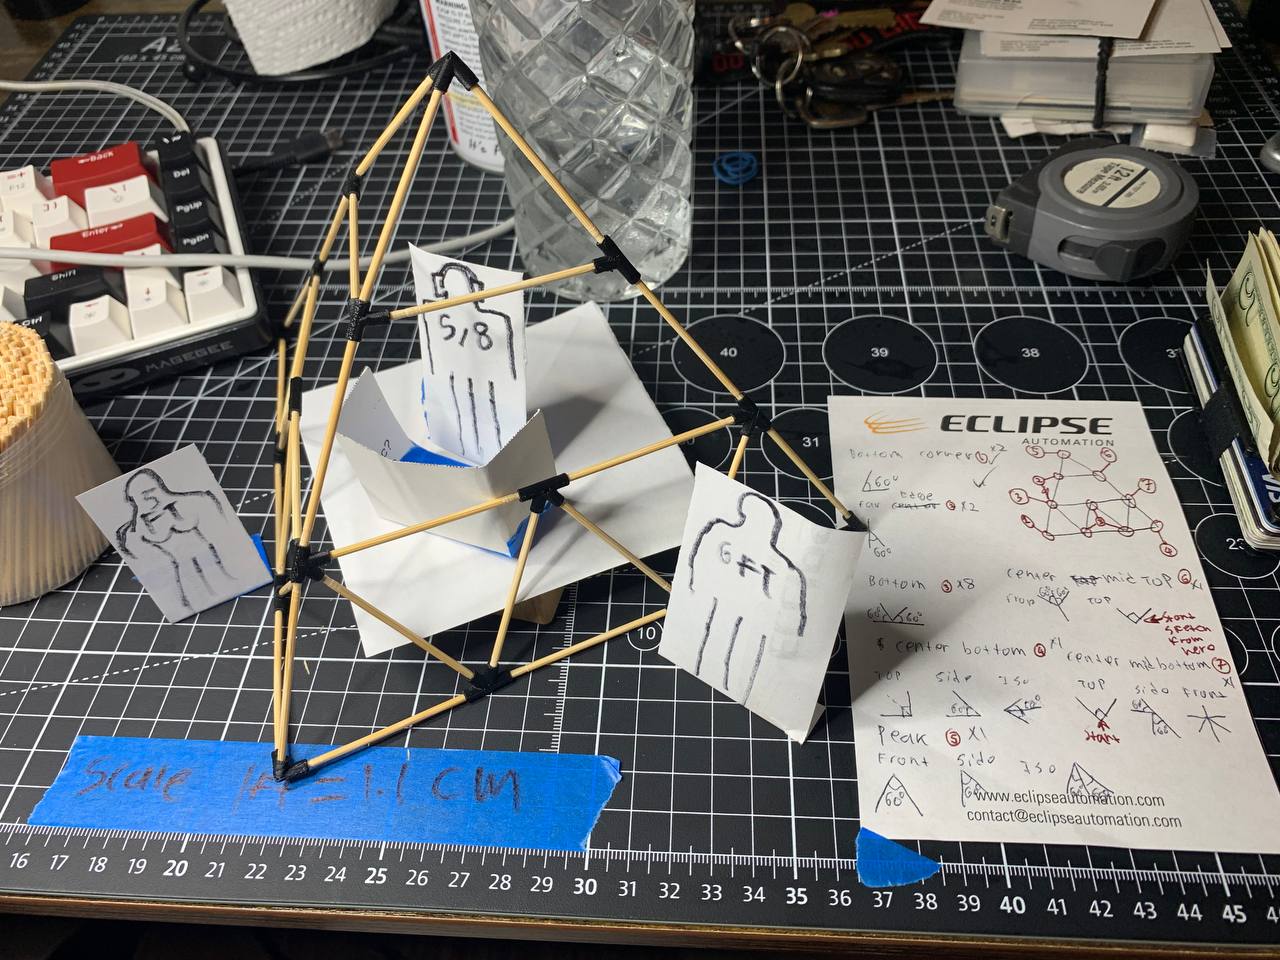
Scale model validation
Quick physical check of geometry and assembly order before printing full connector sets.
Component Selection
The parts were chosen for speed and repeatability. PVC is cheap, forgiving, and fast to cut. The real enabler was the connector system, since it turned the structure into a modular kit.
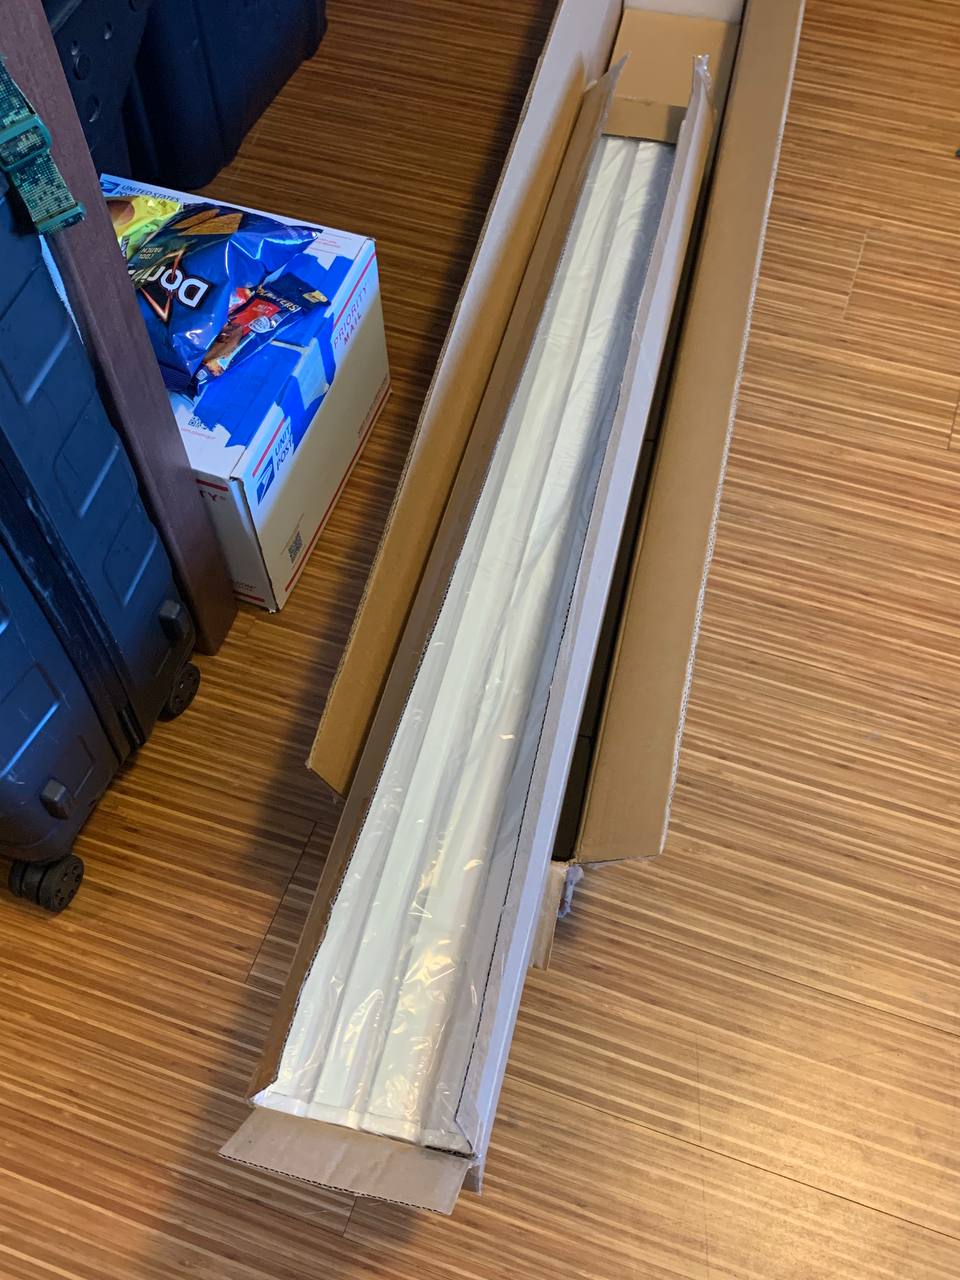
- PVC struts: lightweight, rigid enough at this scale, easy to source last minute.
- 3D printed connectors: repeatable angles and quick assembly without custom fabrication.
- LED shop lights: strong edge definition on camera, simple wiring, high brightness per dollar.
- Diffusion using tape: reduced glare and added color tint when the lights were too intense.
Connector System
I created a connector family that standardizes joints and reduces setup time. The workflow was: sketch connector intent, print test pieces, iterate scale and fit, then print the full set across multiple printers with help from friends.
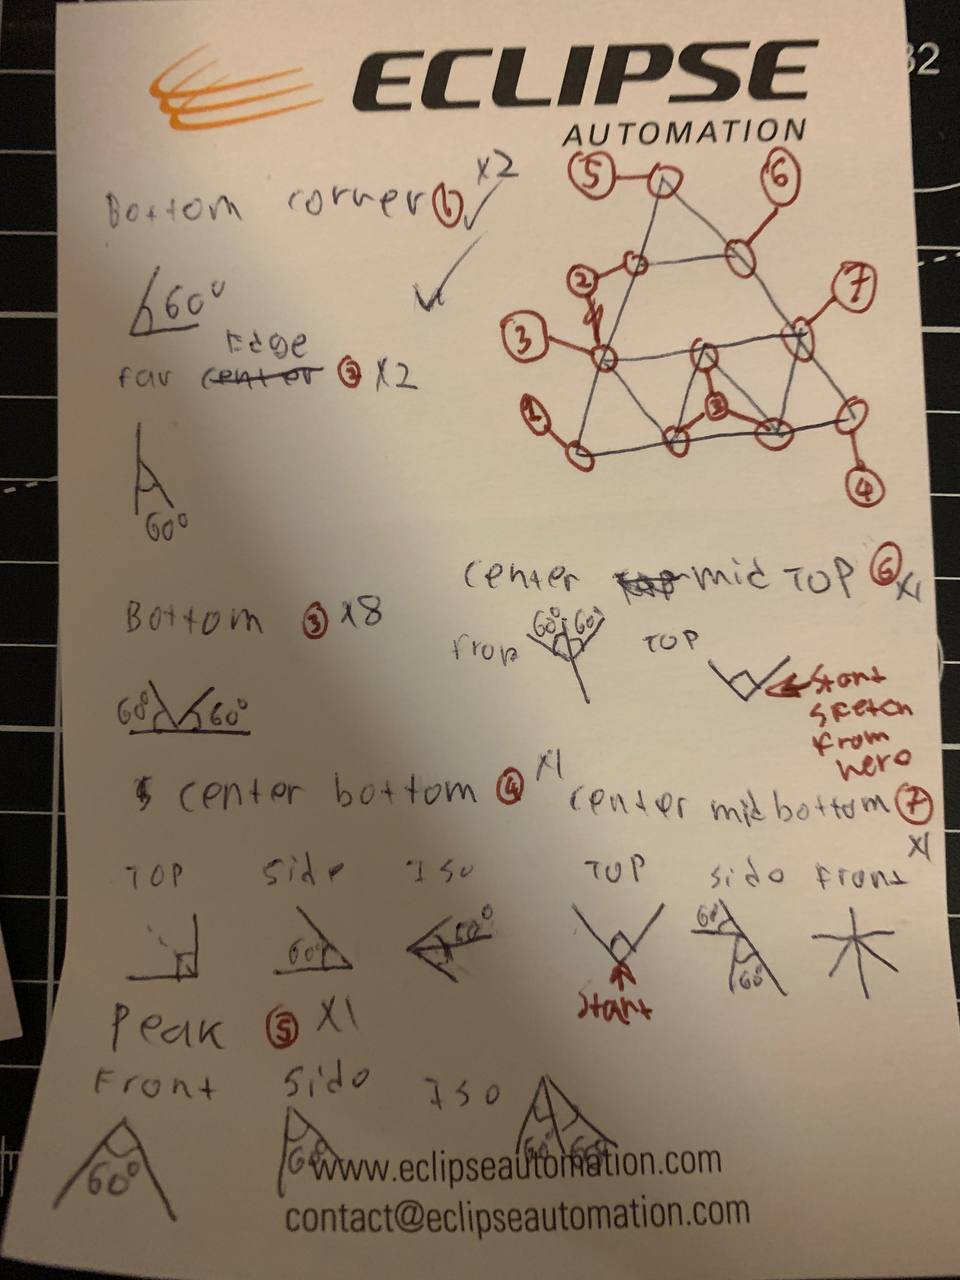
Connector part sketch
Mapped which joint types were needed and where.
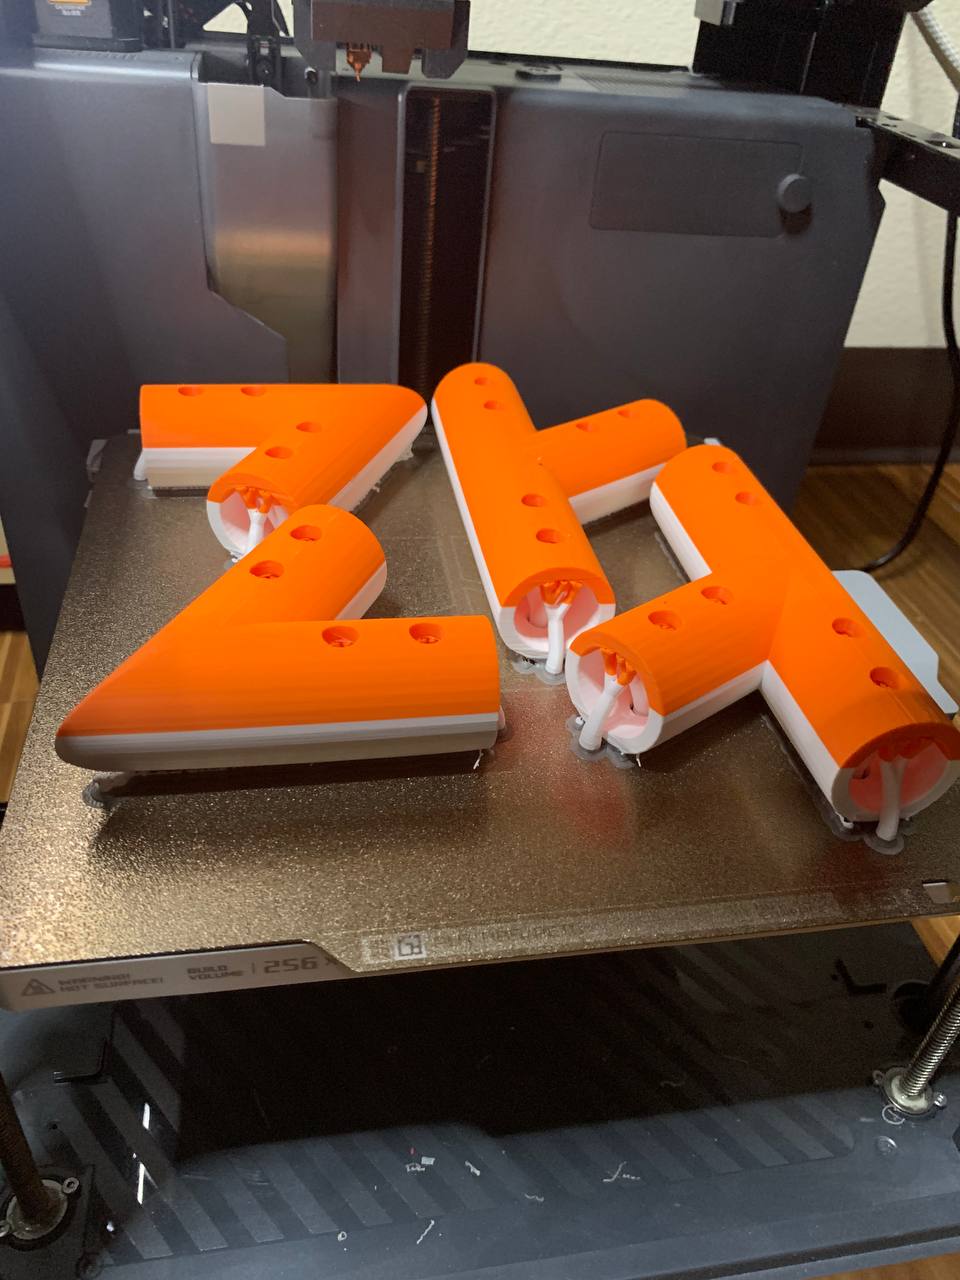
Connectors printing
Scaled and iterated for fit, then produced the full kit.
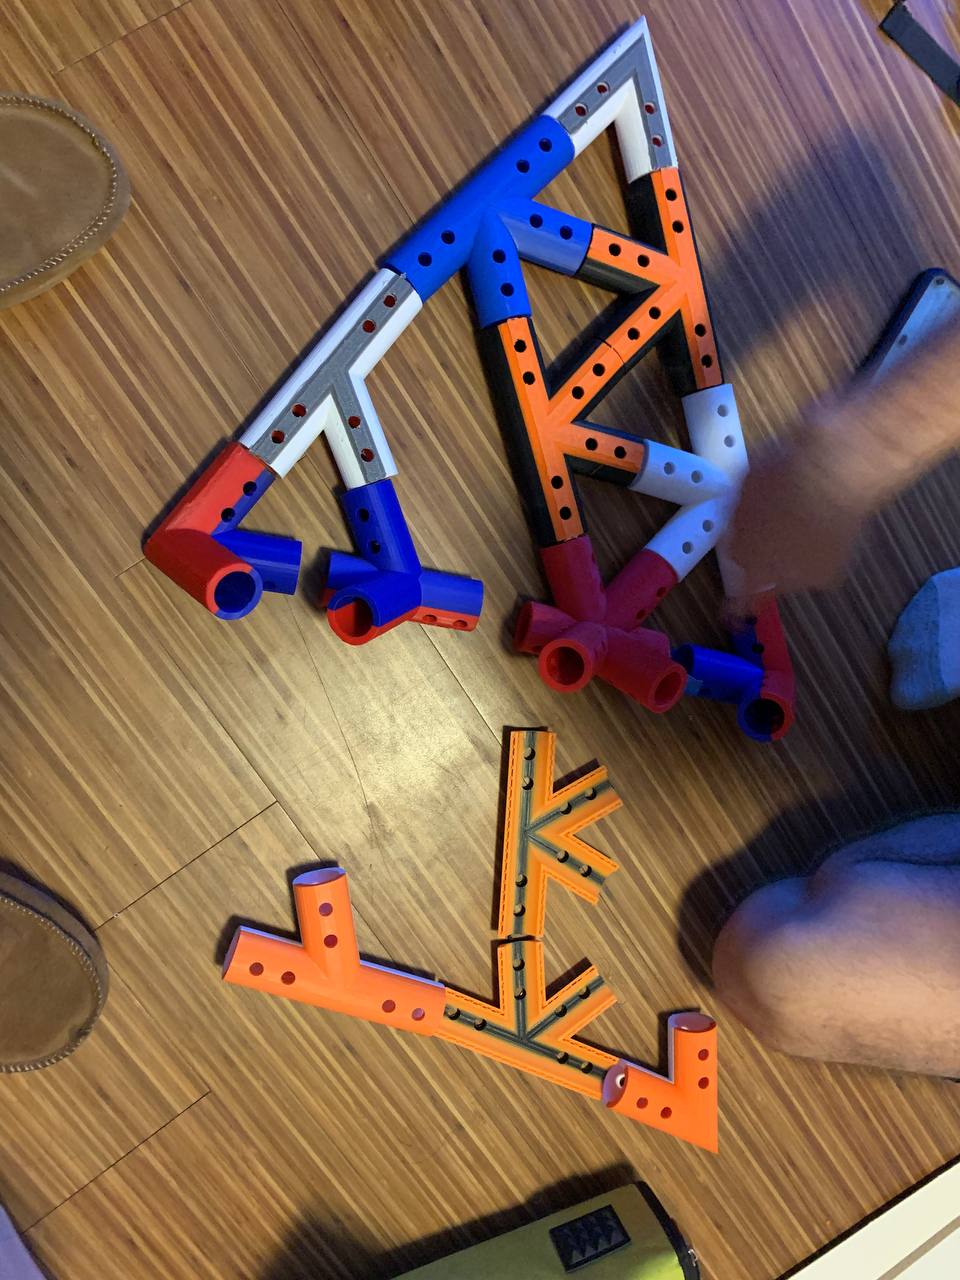
Assembly staging
Pre staged parts so the build could move fast on site.
Bill of Materials (BOM)
Target was to stay around $150. Exact totals varied based on what we could source quickly, but the build stayed in the low budget range by using commodity materials and printed joints.
| # | Item | Specification | Qty | Cost |
|---|---|---|---|---|
| 1 | PVC pipe | 5 ft struts (cut to length) | varies | ~$ |
| 2 | LED shop lights | linear bars | varies | ~$ |
| 3 | 3D printed connectors | custom joint set | set | ~$ |
| 4 | Wiring and splitters | power distribution | set | ~$ |
| 5 | Diffusion | tape tint and glare reduction | as needed | ~$ |
| Total | ~$150 | |||
How
The implementation was a sprint: lock geometry, validate scale, print connectors, source lighting, then assemble and debug wiring on site. The structure stayed stable through the full event duration.
Build process
- Geometry and triangle layout in CAD.
- Scale validation using a toothpick model.
- Connector design and print iteration for fit and strength.
- Bulk connector printing with help from friends.
- Lighting test, then diffusion and tint when brightness was too high.
- Final assembly, wiring routing, and quick safety checks.
Implementation Details
Lighting hardware
Linear shop lights used as edge elements.
Connector production
Printed joint kit enabled modular assembly.
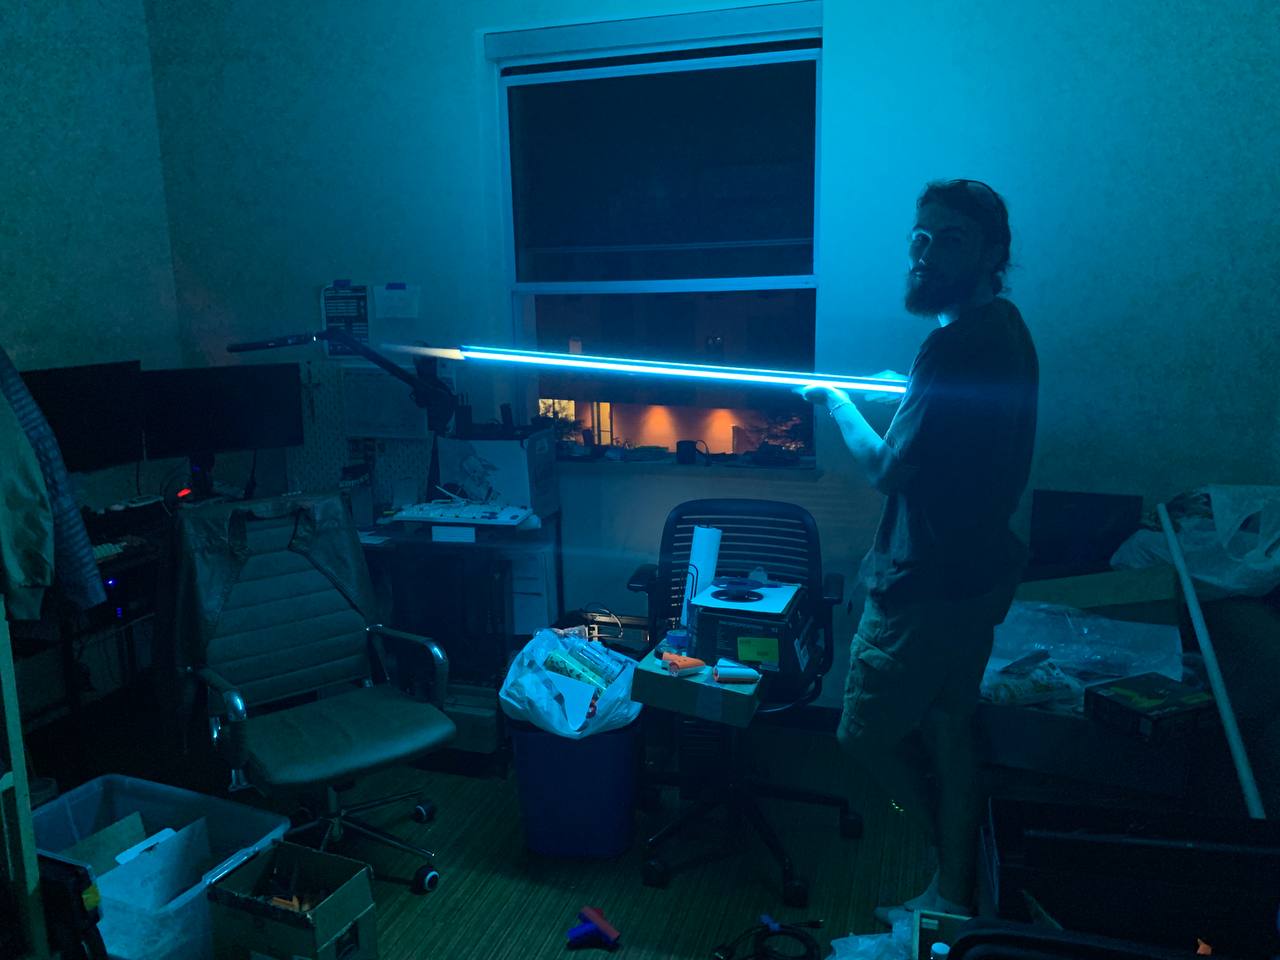
Diffusion and tint
Quick fix to reduce glare and shape the look.
Testing & Results
- Geometry validated at small scale before full build.
- Lighting validated in a room environment, then modified for glare control.
- Structure remained stable through the full multi hour event window.
- Pack down and transport worked as intended due to modular connectors.
What I'd Do Next
- Design a cleaner cable management layer built into the connectors.
- Add standardized mounting features for different light bars and diffusers.
- Improve assembly labeling so anyone can build it without guidance.
- Create a transport case and a repeatable setup checklist.